SOLAR INSTALLATION FOR RV I
9th May 2022
As an RV owner, you may want to learn more about solar installation for your RV. A few things to keep in mind when installing a solar system to your RV are what solar system components you will need before starting the installation, and how many solar panels you’ll need altogether.
Let’s discuss the solar panel system components you will need. Aside from the obvious, solar panels, you’ll also need a battery bank, solar charge controller, an inverter, mounting brackets, and wires/cables.
1. Solar Panels
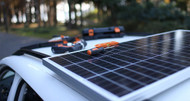
The solar panels themselves will get mounted to your RV roof and absorb energy from the sun into its solar cells to generate direct current (DC) power. Typically, you can use any type of solar panels to power your RV, however, you should still consider RV-specific solar panels for several reasons.
The first being, the amount of open space available on your RV’s rooftop. We mention open space, because most RVs come with various gadgets pre-installed on the roof of your RV, which could limit the size of solar panels you can use.
The second is your RV’s roof type. For example, if your RV has a curved roof, it may be better to choose flexible solar panels, which can be tilted to different degrees (the maximum degree depends on the specific panel).
The third reason is the panel’s operation voltage. RV solar panels usually work with a PWM charge controller to charge the 12V system. However, residential solar panels in most conditions cannot work with a PWM charge controller. In this scenario, you would need an MPPT charge controller with the appropriate voltage rating, which will then allow you to use any solar panel for your RV.
2. Battery Bank
The battery bank is essential for your RV because this is where you can store the power your panels produce. There are different types of batteries you can choose for your RV. The more commonly used among RVs is the lead-acid battery. Despite being priced on the cheaper end of the spectrum, its lifespan is limited to merely 5 years, making it not-so cost-effective in the long run.
The other is the lithium-ion battery, which is more expensive than the lead-acid but has much more pros. It has a longer lifespan and higher efficiency than its counterpart. In addition, lithium iron phosphate (LiFePO4) batteries are highly recommended for RVs. You can get more details of its benefits by reading our blog “What is Lifepo4 and why is it a better choice for RV?”
3. Charge Controller
The solar charge controller is installed inside your RV. It can control the charging rate of your battery, which is a vital component to prevent your battery from overcharging. You can choose between a PWM or MPPT charge controller. Although more expensive than the PWM controller, the MPPT charge controller can operate the panel more efficiently and get a higher overall output.
4. Inverter
If you’re looking to charge devices and appliances that run on DC power, an inverter is the optimal choice for you. Additionally, if you're going to charge common devices and appliances that run on AC power, an inverter is required to convert DC power into AC power.
5. Wires/Cables and Mounts
Wires/Cables with various lengths and attachment types can help you connect the entire solar panel system for your RV. Brackets/mounts can help with the main install of your solar panels top the roof of your RV and position the panel toward the sun.
Stay tuned for Part 2 of the Solar RV install in our next blog!
For more help or information on solar, visit https://www.newpowa.com/a/blog
